
hayward pool pump installation instructions
Hayward Pool Pump Installation Instructions: A Comprehensive Guide
Today, March 8th, 2026, at 7:21 PM, this manual welcomes you to expertly install your Old Hayward Pool Pump, offering a detailed, comprehensive overview for optimal performance.
Hayward pool pumps are renowned for their reliability, efficiency, and innovative designs, serving as the heart of countless swimming pool filtration systems. This guide focuses on the installation of these vital components, ensuring a smooth and trouble-free experience for pool owners and professionals alike. Understanding the fundamental principles of pool circulation is crucial; the pump draws water from the pool, pushes it through the filter, and returns clean, sanitized water back to the pool.
Hayward offers a diverse range of pumps, each tailored to specific pool sizes and operational demands. Proper installation directly impacts the pump’s lifespan, energy consumption, and overall system performance. This manual provides a step-by-step approach, covering everything from initial safety precautions to final post-installation checks, guaranteeing a correctly installed and optimally functioning Hayward pool pump.

Safety Precautions Before Installation
Prioritizing safety is paramount when installing a Hayward pool pump. Always disconnect the power supply to the existing pump and the circuit breaker before commencing any work. Water and electricity are a dangerous combination; ensure all electrical connections are dry and properly grounded. Wear appropriate personal protective equipment (PPE), including safety glasses and work gloves, to prevent injuries.
Be mindful of the pump’s weight and utilize proper lifting techniques to avoid strain or back injury. Inspect all plumbing connections for leaks or damage before disconnecting them. Never attempt to modify electrical wiring unless you are a qualified electrician. Adhering to these precautions will minimize risks and ensure a safe installation process, protecting both yourself and your pool system.
Tools and Materials Required
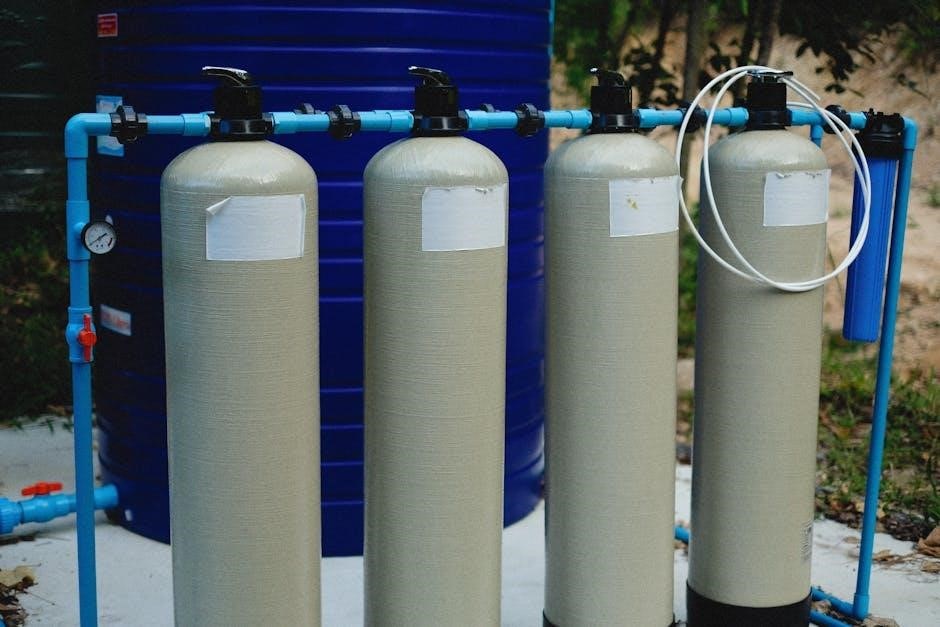
Successful Hayward pool pump installation demands having the correct tools and materials readily available. Essential hand tools include screwdrivers (Phillips and flathead), adjustable wrenches, pipe wrenches, a hacksaw or PVC cutter, and Teflon tape. For plumbing, you’ll need PVC primer and cement, appropriate sized PVC pipe, couplings, and unions.
Electrical components require wire connectors, electrical tape, and potentially conduit for wiring protection. A voltage tester is crucial for verifying power is off. Don’t forget a bucket for draining water, a level to ensure proper pump alignment, and potentially a pump dolly for easier maneuvering. Having a comprehensive kit beforehand streamlines the process and prevents frustrating delays during installation.
Essential Hand Tools
A solid foundation for any Hayward pump installation begins with the right hand tools. You’ll absolutely need a set of both Phillips and flathead screwdrivers, in various sizes, for securing the pump housing and electrical connections. Adjustable wrenches, ranging from 6 to 12 inches, are vital for tightening plumbing fittings.
Pipe wrenches provide the necessary grip for larger plumbing connections. A hacksaw or dedicated PVC cutter ensures clean, precise cuts of PVC piping. Don’t overlook Teflon tape – essential for sealing threaded connections and preventing leaks. A level is crucial for ensuring the pump motor is perfectly aligned, preventing vibration and extending its lifespan.
Plumbing Supplies
Successful Hayward pump installation demands the correct plumbing supplies. Schedule 40 PVC pipe, in the appropriate diameter for your pump model (typically 1.5″ or 2″), is fundamental. You’ll require PVC fittings – elbows, tees, couplings, and unions – to navigate your pool’s plumbing layout.
Threaded adapters are necessary to connect PVC pipe to the pump’s threaded inlets and outlets. Don’t forget PVC primer and cement, specifically formulated for pool plumbing, to create watertight bonds. Check valves prevent backflow, protecting your pump.
Gate valves allow for flow control and isolation during maintenance. Flexible connectors can minimize stress on the plumbing. Finally, a bucket and appropriate sealant are essential for a clean and secure installation.
Electrical Components & Wiring
Proper electrical connection is crucial for safe and reliable Hayward pump operation. You’ll need appropriately sized electrical wire, rated for outdoor use and conforming to local electrical codes. A dedicated circuit breaker, sized according to the pump’s amperage requirements, is essential for overload protection.
Waterproof conduit and connectors are vital to shield wiring from moisture and prevent electrical hazards. A grounding wire is non-negotiable, ensuring safety by diverting fault currents. Wire connectors, suitable for outdoor environments, will securely join wires.
Electrical tape provides additional insulation. A voltage tester verifies power is off before working on wiring. Always consult a qualified electrician if you are uncomfortable with electrical work.

Understanding Your Hayward Pool Pump Model
Before beginning installation, thoroughly familiarize yourself with your specific Hayward pool pump model. Each model – TriStar, MaxFlo XL, or others – possesses unique characteristics impacting installation. Locate the pump’s model and serial number, typically found on a label affixed to the pump housing.
Refer to the dedicated manual for your model; it contains detailed diagrams, specifications, and troubleshooting guidance. Understand the pump’s horsepower, voltage, and amperage requirements. Identify the suction and discharge ports, and note their size and location.
Knowing your pump’s flow rate and head pressure capabilities will aid in proper system design. This understanding ensures optimal performance and longevity.
Pre-Installation Checks
Prior to commencing the physical installation, several crucial checks are essential for a safe and efficient process. First, verify the electrical supply matches the pump’s voltage and amperage requirements. Ensure a dedicated circuit breaker of the correct size is available and properly grounded.
Next, conduct a plumbing compatibility assessment. Confirm the existing pipe size aligns with the pump’s suction and discharge ports. Inspect all pipes, fittings, and valves for cracks, leaks, or corrosion. Ensure adequate space around the pump for maintenance and access.
Finally, double-check that all necessary tools and materials are readily available, preventing delays during installation.
Electrical Supply Verification
Confirming adequate electrical supply is paramount for safe and reliable pump operation. Begin by identifying the pump’s voltage and amperage specifications, typically found on the motor’s nameplate. Verify your electrical panel provides a dedicated circuit matching these requirements.
The circuit breaker must be appropriately sized to handle the pump’s load without tripping. Ensure the wiring gauge is sufficient for the distance between the panel and the pump, preventing voltage drop. A qualified electrician should perform this assessment.
Crucially, confirm proper grounding to prevent electrical shock hazards. Use a multimeter to verify the ground connection is secure and continuous.
Plumbing Compatibility Assessment
Before installation, meticulously assess your existing plumbing to ensure compatibility with the Hayward pump. Verify pipe sizes match the pump’s inlet and outlet connections – typically 1.5” or 2”. Inspect all pipes, fittings, and valves for cracks, corrosion, or leaks; replace any damaged components.

Confirm the suction and discharge lines are appropriately sized to minimize friction loss and maximize pump efficiency. Consider the total dynamic head – the vertical lift plus friction losses – to ensure the pump can deliver adequate flow.
Check for any obstructions within the plumbing system that could restrict water flow. Proper compatibility prevents costly rework and ensures optimal performance.
Step-by-Step Installation Process
Begin by carefully unpacking the Hayward pump and verifying all components are present. Mount the pump motor on a stable, level surface, ensuring adequate ventilation and accessibility for maintenance. Next, connect the suction and discharge pipes, utilizing appropriate PVC cement and fittings for a watertight seal.
Double-check all plumbing connections before proceeding. Ensure proper alignment to prevent stress on the pump housing. Once plumbing is complete, move onto the electrical connections, strictly adhering to local codes and safety regulations. Prior to energizing the pump, prime the pump housing with water to facilitate initial operation.
Finally, perform post-installation checks to confirm proper functionality.
Mounting the Pump Motor
Select a firm, level surface capable of supporting the pump’s weight, plus the weight of the water within the system. Ensure adequate ventilation around the motor to prevent overheating; a minimum of 36 inches of clearance is recommended. Use appropriate mounting hardware – typically bolts and washers – to securely fasten the pump base to the chosen surface.
Vibration dampening pads are highly recommended to minimize noise and prevent stress fractures in the mounting surface. Confirm the pump is positioned for easy access to all connections, including plumbing and electrical components. Avoid mounting the pump directly onto wooden structures without proper reinforcement.
Double-check the stability of the mounted pump before proceeding with any plumbing or electrical work.
Connecting the Suction and Discharge Pipes
Begin by dry-fitting all pipe sections and fittings to ensure proper alignment before applying PVC cement. The suction pipe, drawing water from the pool, should be as short and direct as possible to minimize resistance. Use appropriate pipe sizing – generally 1.5” or 2” – based on your pump model and pool volume.

Apply PVC primer to both the pipe and fitting surfaces, followed immediately by PVC cement. Rotate the fitting as you insert it to ensure even distribution. The discharge pipe, returning water to the pool, should also be properly sized and supported. Ensure all joints are watertight and allow sufficient curing time for the cement before proceeding.
Inspect all connections for leaks before priming the pump.

Plumbing Connections: Detailed Instructions
Prior to initiating plumbing, double-check that all valves are in the closed position to prevent accidental water discharge during the connection process. Begin with the suction side, carefully aligning and securing the pipe to the pump’s inlet using appropriate fittings and PVC cement. Ensure a watertight seal is achieved at every joint, allowing adequate curing time as per the cement manufacturer’s instructions.
Next, connect the discharge pipe to the pump’s outlet, again prioritizing proper alignment and secure connections. Incorporate unions for easy future maintenance and disconnection. Utilize check valves on both suction and discharge lines to prevent backflow. Finally, inspect all plumbing connections thoroughly for any signs of leakage before proceeding to the priming stage.
Priming the Pump
Priming is crucial for establishing initial flow and preventing damage to the pump. Begin by ensuring the pump housing is filled with water. Remove the strainer basket lid and fill the pump housing completely with water using a bucket or hose. Replace the strainer basket and lid securely, ensuring a proper seal.

Next, open the suction line valve slowly to allow water to enter the pump. Monitor the pump for any air leaks around the suction connections. Once water begins to circulate, open the discharge line valve gradually. Continue to monitor the pump’s operation, listening for a smooth, consistent flow. If the pump fails to prime after several attempts, re-check all plumbing connections for leaks and ensure the suction line is fully submerged.
Union Fittings and Valves
Utilizing union fittings within your plumbing setup provides essential flexibility for maintenance and future repairs, allowing for easy disconnection without disturbing the entire system. Install unions strategically before and after the pump, and on both the suction and discharge lines. Ensure proper alignment during installation to prevent strain on the pipes.
Valves are equally important for controlling water flow. Install a suction-side valve to regulate water intake and a discharge-side valve to manage outflow. These valves enable isolation of the pump for servicing or winterization. Check valve placement is critical to prevent backflow. Regularly inspect all unions and valves for leaks, tightening connections as needed to maintain optimal system performance and longevity.
Electrical Connections: A Guide
Prior to any electrical work, absolutely ensure the power supply to the pump’s circuit is completely disconnected at the breaker. Incorrect wiring can cause severe damage or pose a life-threatening hazard. Always adhere to local electrical codes and regulations throughout the entire process. A dedicated circuit is highly recommended for optimal pump performance and safety.
Carefully examine the pump’s wiring diagram, typically found on the motor’s nameplate or within the pump’s documentation. Properly matching the wire colors and terminals is crucial. Grounding is paramount; connect the grounding wire securely to the designated grounding terminal. Double-check all connections for tightness and insulation before restoring power. Consider professional assistance if you are uncomfortable with electrical work.
Wiring Diagram Interpretation
The wiring diagram is your roadmap for safe and correct electrical connection. Typically, it illustrates the motor’s terminals – often labeled T1, T2, and Ground – and how they correspond to the incoming power supply wires. Pay close attention to voltage and amperage requirements specified on both the diagram and the pump’s label. Color coding is standard: black for hot, white for neutral, and green (or bare copper) for ground.
Understand that diagrams may vary slightly depending on the pump model. Some diagrams may show a capacitor connection; ensure this is replicated accurately. If the diagram includes a switch or timer, understand its function and wiring configuration. When in doubt, consult a qualified electrician to decipher the diagram and ensure a secure, code-compliant connection.

Grounding Procedures
Proper grounding is paramount for safety, protecting against electrical shock and preventing damage to the pump and electrical system; Connect the green (or bare copper) grounding wire from the power supply to the designated grounding lug on the pump motor housing. Ensure a secure, corrosion-resistant connection – a loose connection is as dangerous as no connection at all.
Verify the grounding system’s integrity by testing with a multimeter. The resistance between the grounding lug and a known earth ground should be minimal. Local electrical codes often dictate specific grounding requirements; adhere to these strictly. Never rely on the pump’s mounting hardware for grounding; always use a dedicated grounding wire. A qualified electrician should verify the grounding installation.
Post-Installation Checks and Startup
Before initiating the pump, meticulously inspect all plumbing connections for leaks. Ensure all unions are tightened appropriately, but avoid over-tightening, which can damage fittings. Verify the pump basket is clean and properly installed; Double-check all electrical connections, confirming secure wiring and proper grounding. Slowly open the suction and discharge valves to allow water to flow into the pump.
Prime the pump according to the manufacturer’s instructions – this is crucial for initial operation. Once primed, briefly energize the pump to confirm the impeller is rotating in the correct direction. Monitor for any unusual noises or vibrations. Observe the system pressure and flow rate, ensuring they are within the pump’s specifications. Record these initial readings for future reference.
Troubleshooting Common Installation Issues
If the pump fails to prime, check for air leaks in the suction line, a clogged pump basket, or insufficient water level in the pool. Ensure the lid O-ring is clean and properly seated. For electrical connection problems, verify the voltage matches the pump’s requirements and that the circuit breaker hasn’t tripped. Inspect wiring for loose connections or damage.
Persistent vibrations often indicate impeller issues or a misaligned motor. Low flow rates can stem from clogged filters, partially closed valves, or an undersized pump. If the pump overheats, immediately shut it off and investigate potential causes like restricted flow or a faulty motor. Always disconnect power before attempting any repairs.
Pump Not Priming
A common issue, a pump failing to prime usually indicates air trapped within the system. First, verify sufficient water levels in the pool; the pump needs adequate water to draw from. Next, inspect the suction line for any leaks – even small ones can introduce air. Ensure the pump basket is clean and free of debris, as obstructions hinder proper suction.
Critically, check the pump lid O-ring for damage or debris, ensuring a tight seal. Slowly add water directly into the pump housing through the lint basket opening to manually prime it. If problems persist, examine the check valve (if installed) to confirm it’s functioning correctly, allowing water flow towards the pump. Remember to disconnect power before any inspection!
Electrical Connection Problems
Electrical issues demand immediate attention and caution! Always disconnect power at the breaker before inspecting any wiring. First, double-check all wiring connections against the pump’s wiring diagram, ensuring correct wire placement – typically black to black (hot), white to white (neutral), and green or bare copper to ground. Loose connections are a frequent culprit; tighten all wire nuts securely.
Verify the voltage supplied matches the pump’s requirements. Inspect the motor for any signs of burning or damage. If the breaker trips repeatedly, there’s likely a short circuit – do not attempt to reset it repeatedly. Consult a qualified electrician for diagnosis and repair. Remember, improper electrical work is dangerous and can void your warranty.
Hayward Pump Specific Models — Installation Variations
Hayward offers diverse pump models, each with unique installation nuances. The TriStar series, known for its high efficiency, often requires careful attention to impeller alignment during installation to maximize performance and minimize noise. Ensure the diffuser housing is properly seated and secured. Conversely, the MaxFlo XL series, designed for variable speeds, benefits from precise programming of the control panel post-installation to optimize energy consumption and filtration cycles.
Always refer to the specific installation manual included with your particular Hayward pump model. These manuals detail any model-specific requirements regarding plumbing connections, electrical configurations, and priming procedures. Ignoring these variations can lead to reduced pump lifespan or inefficient operation. Proper model-specific attention guarantees optimal functionality.
TriStar Series Installation Notes
When installing a Hayward TriStar pump, meticulous attention to detail is crucial for optimal performance. Specifically, ensure the impeller is correctly aligned within the diffuser housing; misalignment can cause cavitation and reduce pump efficiency. Verify the diffuser housing is securely fastened with all screws tightened to the manufacturer’s specifications. Pay close attention to the o-ring seal between the pump housing and the wet-end, ensuring it’s clean and properly lubricated before assembly.
Furthermore, double-check all plumbing connections for leaks after priming. The TriStar’s high-efficiency design demands precise installation to realize its full potential. Refer to the dedicated TriStar installation manual for detailed diagrams and torque specifications. Proper installation will maximize lifespan and minimize operational noise.
MaxFlo XL Series Installation Notes
For Hayward MaxFlo XL installations, the larger volute requires ample space; confirm sufficient clearance around the pump before beginning. Crucially, utilize schedule 80 PVC piping for both suction and discharge lines to withstand the increased flow rates. Inspect the integrated strainer basket frequently during initial operation to prevent debris buildup, which can reduce performance. Ensure proper motor ventilation; avoid enclosing the pump in a tightly sealed compartment.
The MaxFlo XL benefits from a robust priming system, but thorough priming is still essential. Always check the union connections for tightness after priming and startup. Consult the specific MaxFlo XL manual for detailed wiring diagrams and recommended breaker sizes. Correct installation guarantees quiet operation and extended pump life.
Winterizing Your Hayward Pool Pump
Proper winterization prevents freeze damage to your Hayward pool pump. First, disconnect all electrical power to the pump. Next, remove the drain plugs from the pump housing and piping, allowing all water to completely drain. Consider using a shop vacuum to blow out any remaining water in the impeller housing. Remove the strainer basket and clean it thoroughly, storing it indoors.

For areas experiencing severe freezes, consider removing the pump entirely and storing it in a heated space. Plug the suction and discharge lines with winterizing plugs. Finally, lubricate the pump shaft with a silicone-based lubricant before storage. Following these steps ensures a trouble-free startup next season.
Warranty Information and Registration
Your Hayward pool pump is protected by a limited warranty against manufacturing defects. The warranty period varies depending on the specific model – typically one to three years from the date of purchase. To validate your warranty, prompt registration is crucial. Visit the official Hayward website and locate the warranty registration page.
You will need your pump’s serial number, date of purchase, and installer information. Retain your original purchase receipt as proof of purchase. Warranty coverage excludes damage caused by improper installation, freezing, negligence, or unauthorized modifications. For complete warranty details and claim procedures, consult the warranty document included with your pump or visit Hayward’s support website.
Related Posts

instruction manual cuisinart ice cream maker
Discover the ultimate guide for your Cuisinart Ice Cream Maker! Learn easy recipes, troubleshooting tips, and step-by-step instructions to make delicious homemade ice cream.
woodpecker endo smart endo motor instruction manual
Unlock the power of the Woodpecker Endo Smart motor! Our comprehensive instruction manual guides you through every step, from setup to advanced techniques. Become an endodontic pro today!
kenmore gas stove instruction manual
Lost your Kenmore gas stove manual? No sweat! Download it here and get back to cooking delicious meals safely. Easy instructions, right now!